Capture cards are a super useful tool for content creation. They turn a video output signal into an input that a computer can interpret. However, they are often expensive: internal models can be as much as $300, and external versions will still set you back about $130.
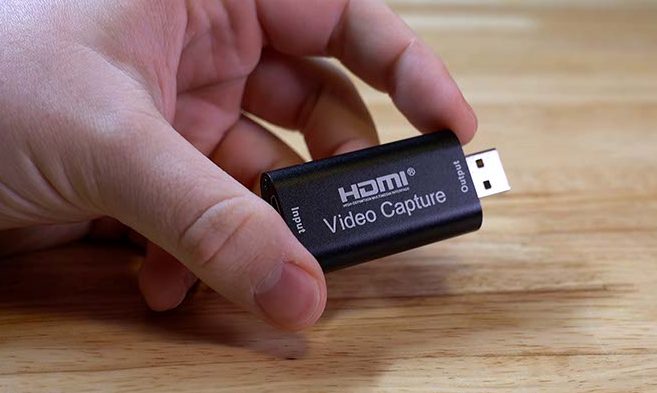
Recently, I stumbled upon a capture card that could pass as a thumb drive and is just a fraction of the price as conventional models at $25. Let’s take a look at the BlueAVS 1080p capture card and see if there’s any value in something this cheap.

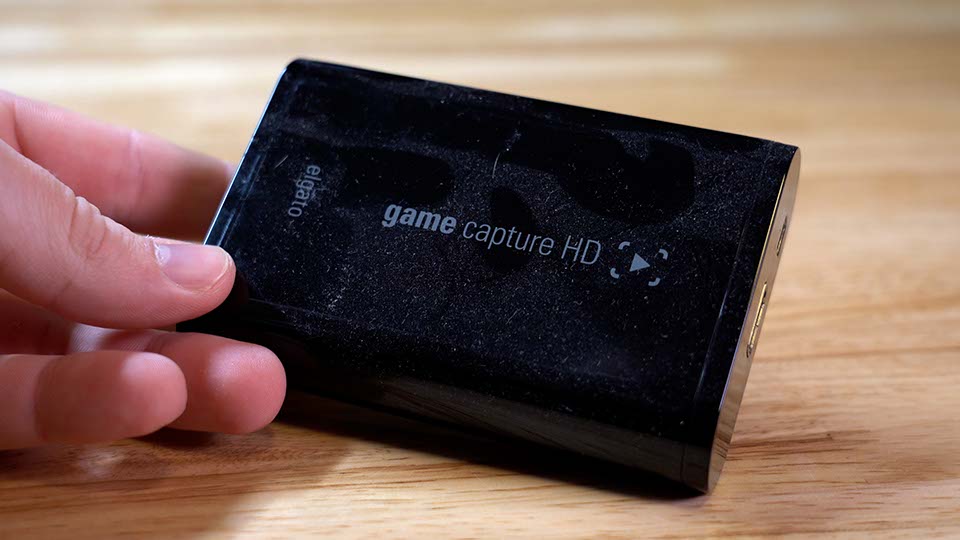
I’ve been creating content for a while, recording video, editing it, you know the deal. If I had this little guy when I was first getting started, my life would have been so much easier. I actually purchased a capture card years ago – the Elgato Game Capture HD. I tried hooking it up to my PS3 to record gameplay but was never really happy with the result. The video quality wasn’t stellar and the device requires Elgato software to record, which discouraged me from using it consistently.

The beauty of the BlueAVS card is that I haven’t found something it couldn’t record. I was recently asked to set up a livestream setup for a church. We ran HDMI cables to two AIDA Imaging cameras, plugged these onto the other end of the cable and they work flawlessly. It seems like it takes your video signal and makes it look like a webcam so that the computer will receive the input. This means that nearly any HDMI output can be sent to the device and recorded by your computer.
All you need to record using the card is an HDMI output, a computer with recording software like OBS and, of course, the stick itself. After that, it really is plug and play. Attach the stick to the end of an HDMI cable and either plug the stick directly into the computer or use the included USB extender. I usually opt to use the extender since it takes some stress off of the USB port. Especially if you’re using big, heavy HDMI cables, the ports can undergo a lot of tension and potentially be damaged. Once you’re plugged in, you can start recording right away.

I always like to go over the construction of a device but there really isn’t much to see here. The stick is made of metal with a matte finish and has a USB type A port. Unfortunately, it’s USB 2.0, which is slightly outdated, but is actually quite practical considering that the max output of the device is 1080p @ 60fps.
Recording Quality
We’ll have to dive into some technical jargon here for a second, but it will be important for understanding the maximum capabilities of the stick.
For USB 2.0, the advertised theoretical max is 480 Mbyte/s, but this is actually closer to 40 Mb/s according to researchers at Cypress, a manufacturer of USB controllers. This also translates to 40,000kb/s, which will be an important reference point.
For streaming video, a recommended bitrate for 1080p video is 4500 kb/s or 4.5 Mb/s. So USB 2.0 can handle that. Theoretically, and very theoretically, it seems that USB 2.0 could even handle streaming 4K video. The recommended bitrate for 4K @ 60fps is 20-51 Mb/s, which is barely within the wheelhouse of USB 2.0.
My guess is that there are technical limitations which would prevent this from working, for instance the packet size might not be large enough to support all the data needed to move frames that large quickly enough. However, the stick is capped at 1080p video anyway, so don’t get your hopes up. If you want to expand into 4K video capture, you’ll have to upgrade to something like the Elgato CamLink 4K at $120.
Because you’re limited to 1080p video, that’s the max resolution you’ll be able to record. Ideally, I would like to have the option to record video at 4K. I normally record my YouTube videos to an SD card at 4K @ 30MByte/s, and I upload them to YouTube in 4K. So if I’m using the stick, I would have to drop down to 1080p. And if you’re recording a video game or some other media source, that too will be limited to 1080p. This isn’t exactly an optimal viewing experience, but it’s usable. After all, a majority of content is consumed via mobile devices where a lower resolution will be less noticeable.
The Proof is in the Pudding: Sample Footage
So now that we know what it’s capable of, let’s take a look at some samples compared to footage recorded with my normal camera. OBS allows full control of video bitrate as well as several other quality control settings. I normally export my videos to be set for a target bitrate of 20 Mbps while editing. It’s fairly manageable for exports, it doesn’t take too long and is recommended for 4K video exports. So there’s a loss of bitrate from the original footage when I export, and there will undoubtedly be compression upon uploading to YouTube.
After taking a look at some of the sample recordings, I would say that the recordings are definitely passable. The colors looks similar, but the clarity of the image depends heavily upon the bitrate used for the recording. When I use my Sony A7III recording in 1080p at 30fps and 30 Mbit/s, it looks much clearer than when I use the capture card at the same bitrate. There is a lot more recording hardware inside of my camera than there is in this little stick, so I’m not surprised that its encoding provides better quality.
Another large factor is the “CPU usage preset” option in OBS. This determines how much your computer will use it’s CPU to encode the footage. However, setting it too high can debilitate the computer and hinder other processing factors. When I set it to placebo, the most intensive option, my CPU was pinned above 90% usage and recording lagged significantly. Most of the footage from the slower CPU presets is unusable because the CPU on my laptop couldn’t keep up, resulting significant loss of frames. I’m using the 8 core 2020 Macbook Pro, which normally keeps up with encoding 1080p video fine. It could be user error in this case and that I don’t 100% understand what this preset changes, but I don’t find the increase in quality worth it. There is not much change in image quality from the veryfast to the slow preset, so I would just leave that at the mode which is easiest for the computer to work with.
As you might expect, there is really no comparison between the 4K footage and the 1080p footage from either source. The 4K quality just absolutely outshines the 1080p footage. We can take a look at 4K even when it’s downsampled to 1080p and make a comparison that way as well. While the 1080p looks OK, the downsampled footage is clearly sharper. This is due to the higher pixel density, which is another good reason to record in 4K: even if when not exported in full 4K, footage still retains data from the larger image size.
What’s it meant for?
It’s also important to consider that these two recording methods probably have two different intended use cases. Recording to storage in a camera is meant to reproduce the image as cleanly and beautifully as possible in the future, whereas a livestream software is meant to keep a constant feed of video broadcasting to your audience. I have yet to find a circumstance where my camera will buffer, unless I’m taking RAW photos at a high frame rate. Camera buffering is also usually due to my SD card not keeping up with my camera’s output. OBS, on the other hand, is trying to fit its rendering process in on a machine that can be running lots of other processes simultaneously. Additionally, the stick has to render the footage in some way in order to process it into a signal that’s understandable to the PC.
It’s also worth mentioning that while the stick is super cool, it’s not magic. There’s only a thumb drive worth of hardware that can be devoted to interpreting video signal, so there isn’t a lot of processing power here. What surprised me is how well the video game footage came out. Perhaps it’s because the video is coming pre-rendered out of the GPU and the stick might be doing less work when interpreting the video signal, but it looks pretty good. Weirdly, it does look much more saturated than when it appears on my screen, but I had to mess with my video settings in game to get it to work at all.
Conclusion
While I recognize that there are some issues with the video quality, I think my favorite part about the stick is it’s creative options. This makes recording video game gameplay extremely easy, you can plug it into a GoPro and livestream from there if you’ve got a long enough cable, you could even record output from a DVD player if you want to archive family videos. And only family videos – we don’t advocate for piracy on this site.
If you’re wanting to expand your creative capabilities, this is a great thing to pick up. Like I mentioned, you can pick up any output so you’re only limited by your creativity in terms of what you can capture. Granted, it probably won’t be the highest quality footage you’ve ever seen, but it’s definitely usable. For a $20 price tag, it’s hard to pass up.
