An external audio recorder is a great way to upgrade the quality of your film production. Having dedicated hardware for recording sound means higher fidelity audio, more mobility and added functionality.
The Tascam DR-70D is a 4-channel external audio recorder built especially for use with DSLRs in video production. I’ve been using one for about a year and I’ve found it to be a well-built, versatile addition to my kit.
In this cover my impressions of the DR-70D as well as how to use it effectively. There are lots of different options to cover, so let’s get started.
Disclaimer: External links to products mentioned in this article may pay an affiliate commission to support content like this. These commissions do not affect the opinions reflected in our articles.
Device Overview
When you first hold the device, the first thing you’ll notice is the orange mounting brackets on the front of the device. These are used for mounting the DR-70D into an audio recorder bag or a shoulder strap for easy transport. For a small kit, I recommend the Orca OR-28. I bought it the same time I got the DR-70D, and it’s really great for keeping my equipment safe and organized.
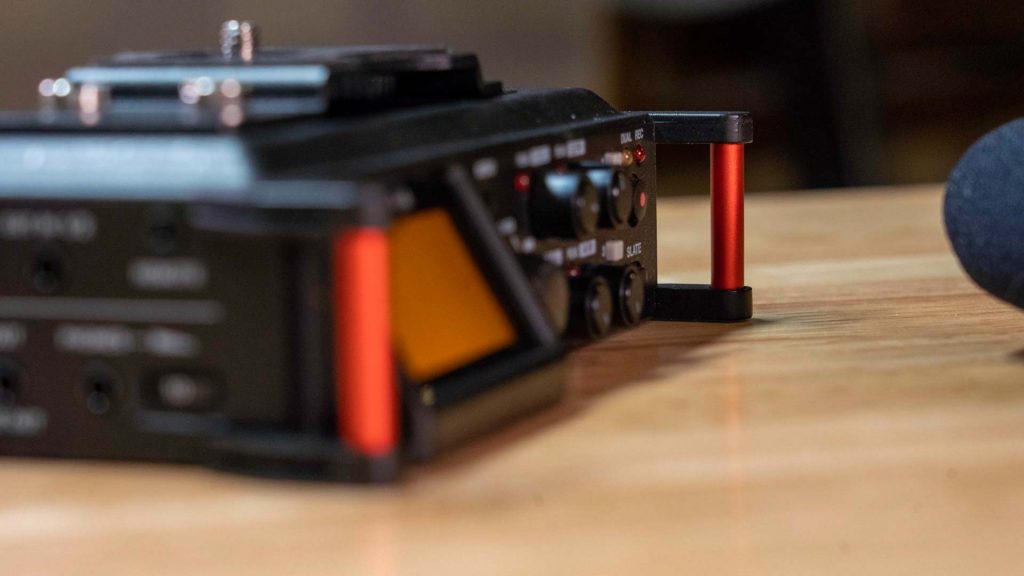
On the same side of the device as the brackets is the LCD screen. This will display levels and metadata while a recording is in progress. It has a backlit mode that illuminates the screen bright orange. I recommend turning this on, otherwise the black text on a gray screen is difficult to read.
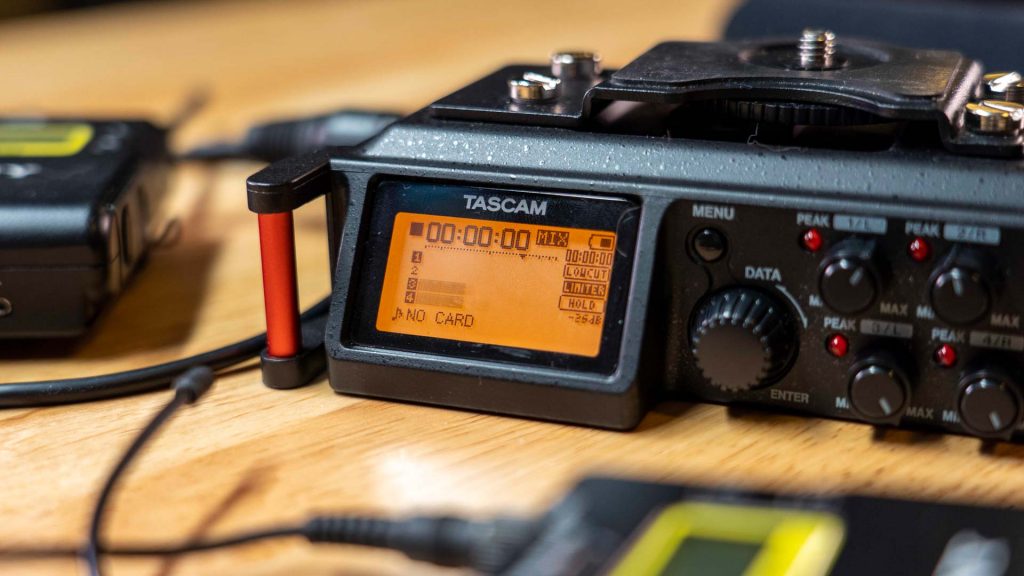
There are also five knobs on the front of the device. The large one labeled “Data” is used for navigating the menus and selecting options. The four small ones are labeled for individual channels and can be used to manipulate levels while recording live. This feature is especially useful for run-and-gun filmmaking or if you have dynamic audio sources.
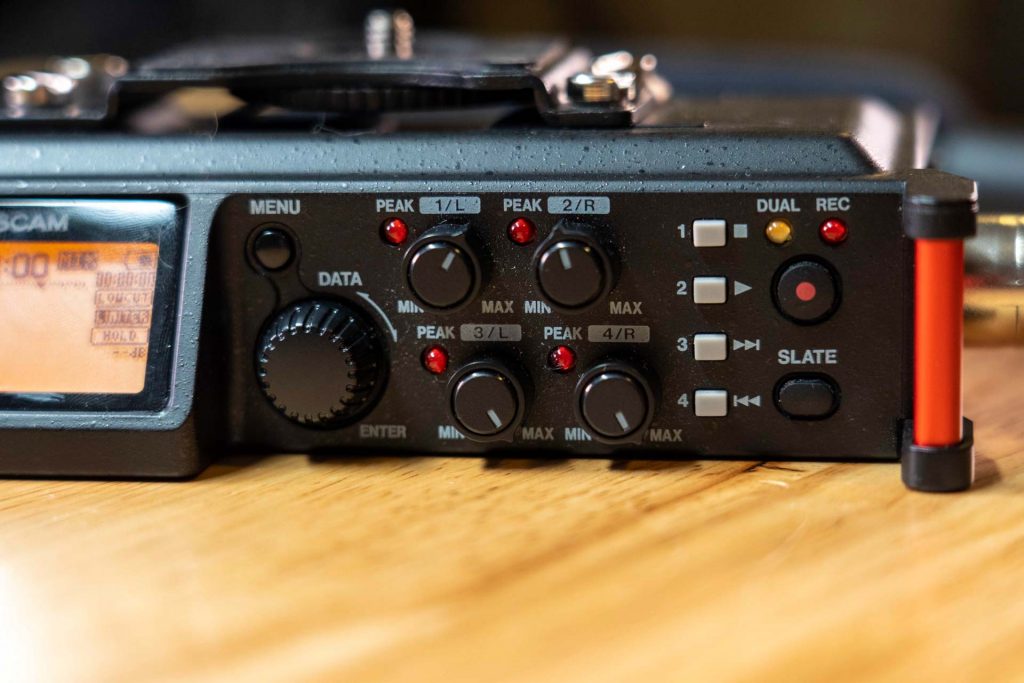
The four small gray buttons are four controlling playback and can also help in navigating menu pages quickly. The record button is pretty self-explanatory: press it to start and stop recordings. The button below it, the slate button, was one I hadn’t encountered before using this device, so I’ll explain how it works.
The DR-70D supports the recording of multiple tracks at once. Odds are you’ll want to align these tracks for your export, and slate makes it much easier to do that. You can press and hold the slate button to generate a short tone at a constant volume to help you align the clips in your editing software.
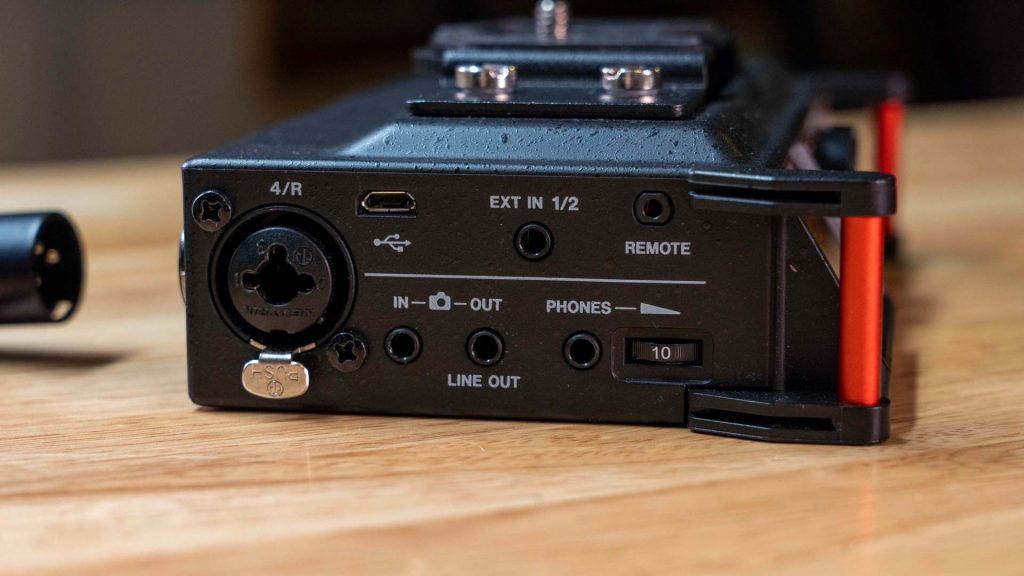
The XLR and other inputs are on the sides of the DR-70D. There are four XLR/TRS combo jacks with locking metal tabs to keep the connections secure. Additionally, there is an input for a 3.5mm jack. A camera in port allows for audio from your camera to be monitored and recorded by the DR-70D. Camera out is just the opposite, allowing for audio from the DR-70D to be recorded directly to your camera’s video file.

A remote jack allows for the connection of a sold-separately remote from Tascam that enables device operation from a distance. Finally, a headphone jack allows for monitoring and its level can be adjusted via a small scroll wheel.
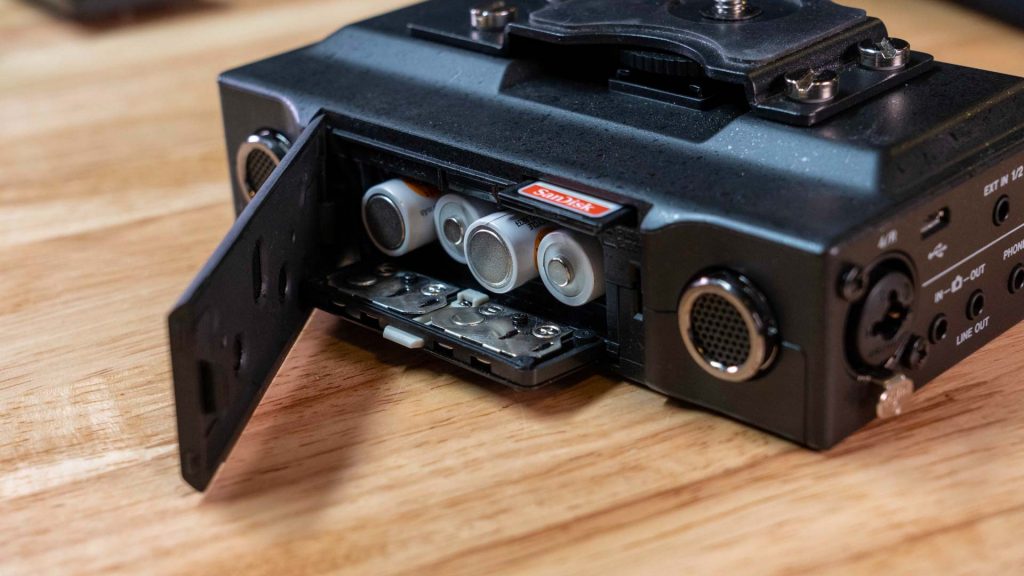
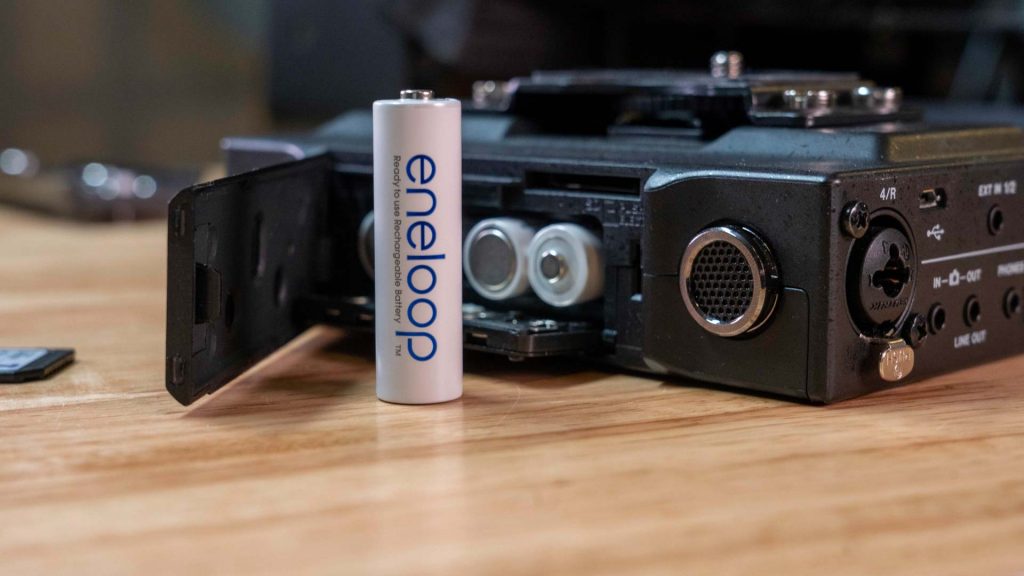
The back contains a hinged flap behind which is the battery compartment and an SD card slot. Also on the back is a pair of built-in omnidirectional microphones. These are good for recording ambient sound, but not much else. We’ll cover how to activate them later in the article.
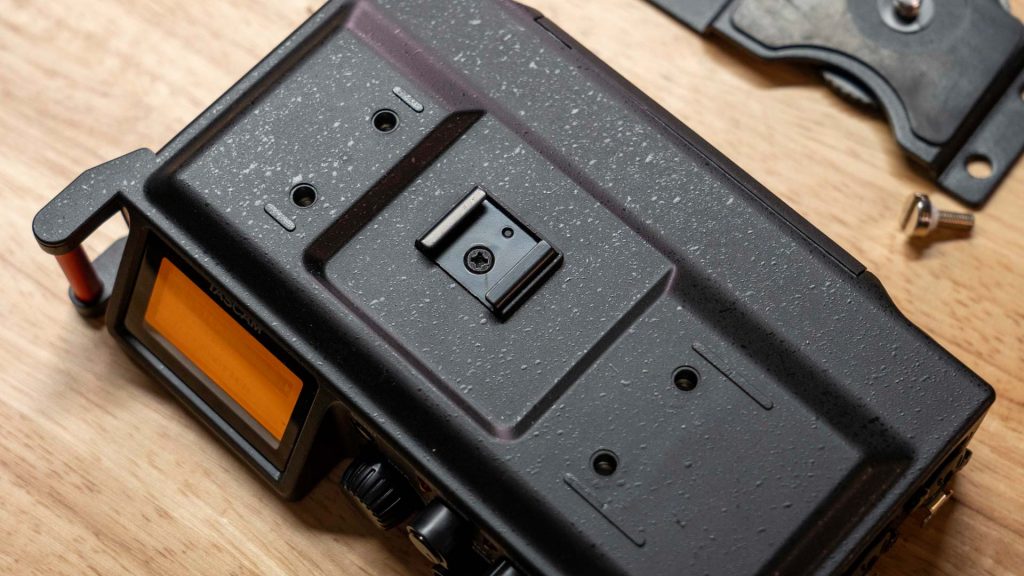
Mounted on the top of the DR-70D is a plate with a captive ¼ inch screw. If you’re using a camera, you can mount it here and monitor video and audio recording at the same time. After removing 4 screws, you can expose a cold shoe mount for a shotgun mic or any other accessory you like.
Navigating the Menus & Exploring Options
The device itself is pretty simple but the menus get a little more complex. Audio recording can involve changing lots of settings, and the DR-70D offers lots of different settings. If you would like to skip this section and read the summary, click here.
To enter the menus, press the menu button. You’ll be presented with several options for pages including Basic, Monitor, Input, Record, Slate, Mic, Browse and Misc.
“Basic” Page Configuration
Basic will allow you to configure each channel individually. Using the Data wheel will let you scroll through each page sequentially. You can also use the gray playback buttons to skip between tabs. On each channel there are a variety of options. The first will allow you to turn it on or off for recording purposes. You can also adjust the pan of each channel.

If you are recording two tracks in stereo at once and want to preserve them individually, set one channel all the way right and the other all the way left. In post, you can isolate the two channels and mix them individually which will give you more control over the recording. You can also record up to four channels at once, but you will have at least one track with two recording channels on it. This will make individual mixing more difficult.
After that, you can set the gain of each channel to be automatically raised by certain intervals.
Finally, you can set the input for each channel. XLR/TRS will receive input from the four XLR jacks we mentioned earlier. This option is available for all four channels. For channels one and two, you can receive input from the ⅛ inch external input jack. If the device requires power, select the EXT_POWER option. If no power is required EXT_STEREO should be selected.

I couldn’t find any documentation about how to use the built-in mics on this device, but I did some research and found that it’s very easy.
The DR-70D’s built-in mics can be activated using the MIC input on channels three and four. The normal XLR/TRS inputs can also be used, but if you change the input to MIC, the built-in omnidirectional microphones are activated. These are only recommended for recording ambient sound or sources very close to the device but are still a handy feature to have.
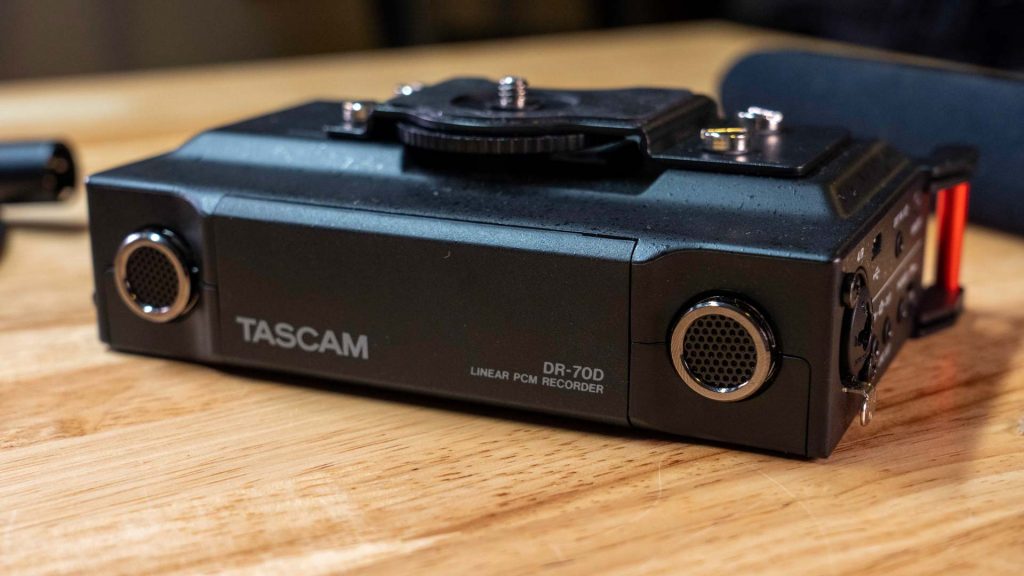
They sound much better than I was expecting – if you skip to 6:50 in the video above, you can listen to a sample.
Hit the back button to return to the menu page selection and we can continue to the Monitor tab.
“Monitor” Page Configuration
Monitoring refers to receiving an audio signal identical to the audio being recorded by your device. On this page, the settings for receiving a monitor signal can be configured. Notably, these settings will not affect the file being recorded in any way.

The monitor select option will change what is being monitored. There are two options: MIX and CAM. MIX is the tracks that are currently being recorded by the DR-70D. CAM will let the monitor hear the input from the “Camera In” jack mentioned earlier.
The output level option allows for the adjustment of the monitor signal’s volume by a constant level. This is also the only way to adjust output for the Camera Out/Line Out jack. I normally use only the headphone jack and have found the volume knob to be enough adjustment for my purposes.
Output gain will change depending on the device to which you’d like to send your monitor signal. Line refers to line power, which will supply enough power to an external monitoring system like powered speakers. Microphones often require more power than a line input, so be careful when choosing how much power to provide to your source. You can damage equipment if using the wrong amount of power. If you have questions about line power, check out this article by Shure. Setting it to CAM will set the gain for output to a camera. That does it for the Monitor tab.
Next in line is Input, which is one of the more complex pages in all of the menus. It allows the configuration of settings for each individual input, so there is a lot to cover.
“Input” Page Configuration
Input gain should be adjusted to closest match the kind of equipment you’re using. Mic is the default setting and should be used when connecting and/or powering a microphone with the DR-70D. Select line when connecting any kind of microphone that requires line power. MIC+PHANTOM can be used to supply power to a microphone using the DR-70’s battery. Almost all microphones require some sort of power, which the DR-70D can supply. You can also change the voltage delivered between 24V and 48V in the Mic Settings menu depending on what your mic requires.
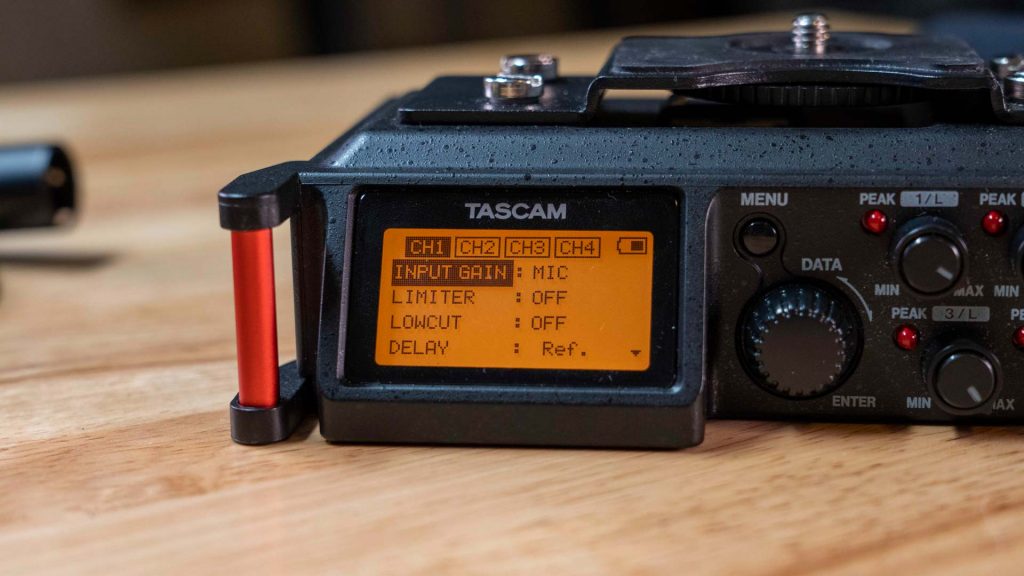
A low cut filter can also be applied here to reduce noise from wind or electronic hums near your source. Having this off is the default but setting it to mono will activate it for the selected channel. When set to link, the low cut filter will be activated on both the current and linked channels.
Be warned that this will be baked into the audio file and there are ways to achieve this same effect in post. I would recommend doing this in your editing software if it has to be done at all – you will have much more control that way.
The Delay option allows you to offset the recording of your audio by up to 150ms. The only scenario where I could think of this being helpful is if you are recording video directly into your camera from a distance.
I couldn’t find a good definition of what phase is used for. I think it’s for recording two microphones on one source positioned slightly differently. You can set it to be on or off here.
After input comes the record tab, which also has a bunch more options.
“Record” Page Configuration
The first option will allow you to configure your file type. The first option, mono, will allow you to record all your inputs into one track of audio. Stereo puts your recording on two tracks of audio. Finally, mixed allows for the recording of both analog and digital signals.

Changing the format will allow you to change the file type and bitrate of your recordings. For file type, your options are BWF and WAV. WAV is Waveform Audio File Format, the standard uncompressed audio file for Windows machines. BWF is exactly the same audio file as WAV, but just contains more metadata than a normal WAV file. Unless you work in broadcast and have direction to use BWF, WAV is probably fine.
You have three options for bitrate: 44.1kHz, 48kHz and 96kHz. Bitrate is how much data the device records per second, so, theoretically, more data means a higher-quality recording. Your target for this setting should be reflected by the platform you upload to. For YouTube, 44.1kHz is recommended, so I export my video’s audio at that level. I do record at 48k in the hopes that the recording is higher quality thanks to the extra data.
We are now through the bulk of the menus – only a few short pages left to cover.
“Slate” Page Configuration
The Slate menu only has two options. The first is auto tone which allows you to set a slate tone to be recorded automatically within a track. The tone can be set to record either at the beginning or at the beginning and end of a recording. The second option is configuring the tone volume.

“Mic” Page Configuration
The mic settings page allows you to enable mid-side recording, labelled “MS”. I have never used mid-side recording but I believe it is a recording style where microphones face each other while rotated 90 degrees. I could only find examples of it being used in recording instruments. You can set the recording channels to decode the mid-side setup in pairs.
Here is also where you can change the voltage of the phantom power supplied to the microphone.
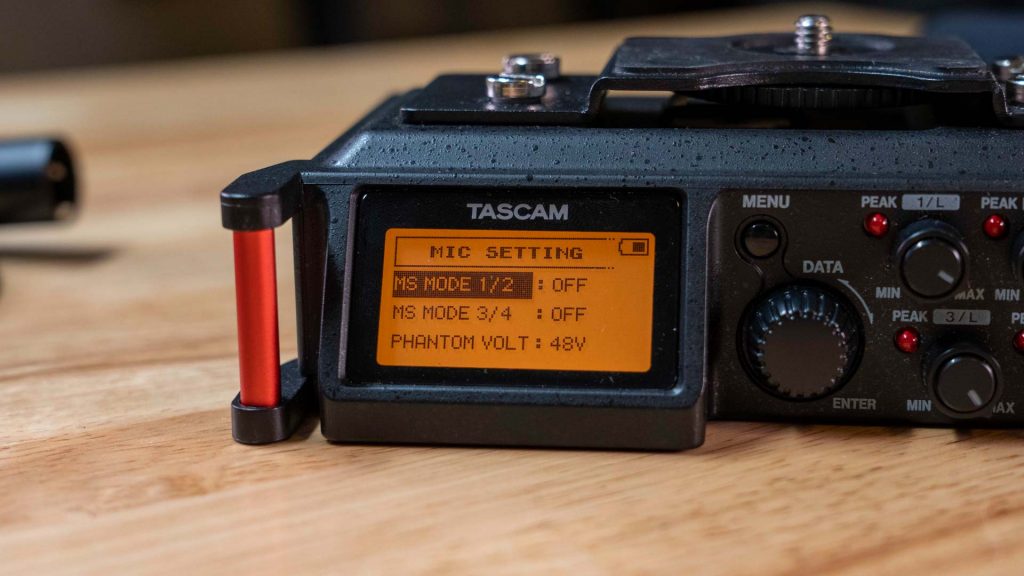
“Browse” and “Other” Page Configuration
The browse menu is where you can find the files recorded and play them back. This is where the four gray buttons are helpful.
Finally, in the other menu, you can change miscellaneous settings like what battery type you’re using, your device name and file naming conventions. Here is also where you can set the backlight of the LCD screen as well as format your SD card.
Now we have (exhaustively) covered the menus on the DR-70D. We can move on to discussing the device’s construction and my impressions of using it so far.
Device Construction – How It’s Made
The device is built pretty well. Despite the outer construction being entirely plastic, the DR-70D has a decent amount of weight and feels sturdy. It feels like the plastic is of a high quality and thickness. I wouldn’t be surprised if there were some metal reinforcement inside the device to give it a rigid frame.
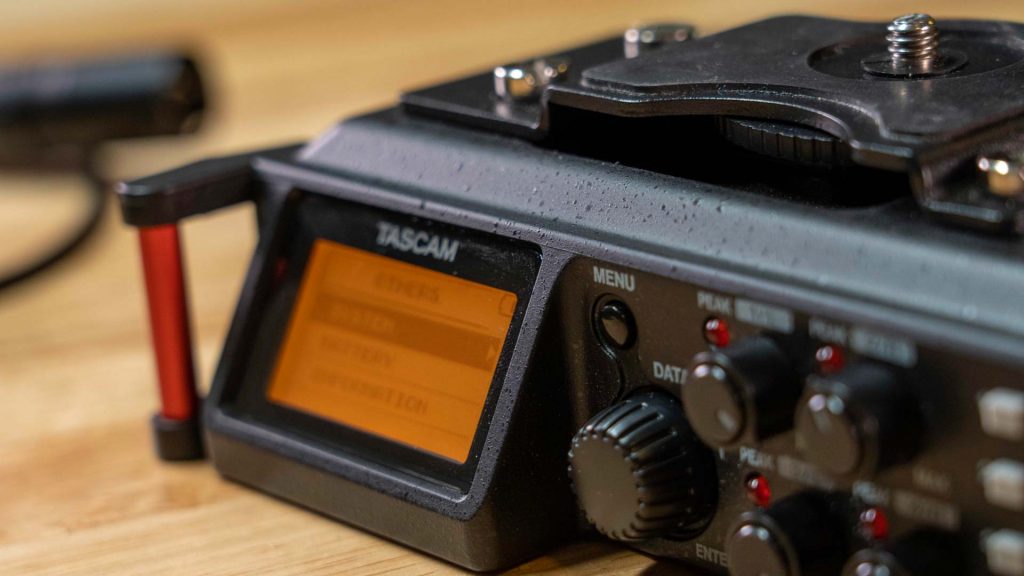
The orange shoulder strap brackets are some of the only visible metal components and are a very handy feature to have. As mentioned earlier, I use the brackets to mount the DR-70D in my audio bag by Orca, which gives me a safe, compact place to store my audio kit. Even if you don’t have an audio bag, using shoulder straps will make recording on the go much easier.
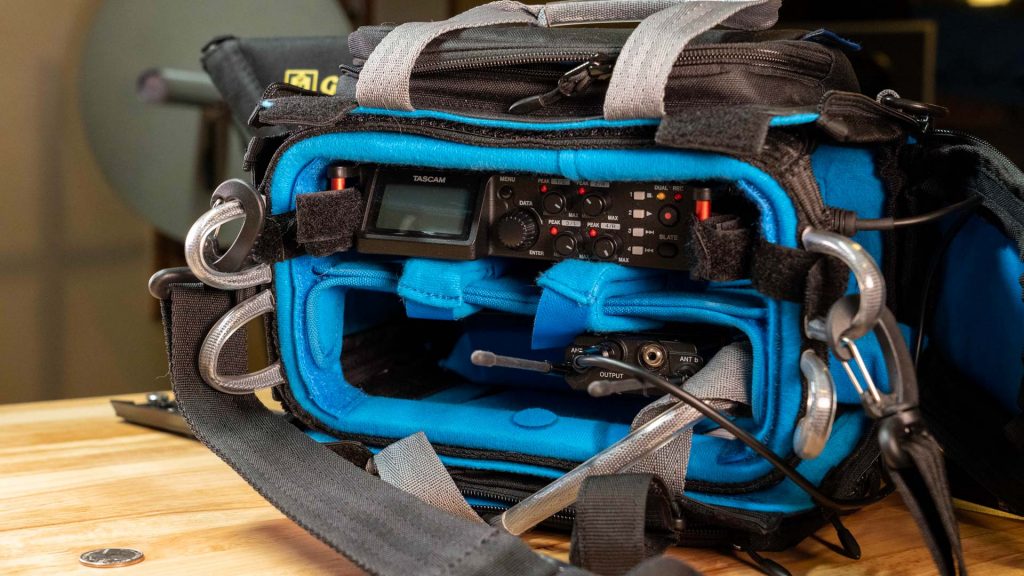
The XLR connections feel very secure thanks to the metal tabs, which is a feature I greatly appreciate. There’s nothing worse than having a loose connection and not learning about it until after you’ve done a take.

The ¼ inch connections, both on the top and bottom of the DR-70D make it even more friendly to DSLR users. My favorite way to use this feature on set is to mount the DR-70D to a tripod, then secure my video rig to the top of it. This allows for monitoring of video and audio recording simultaneously while you’re recording. This is super helpful as a one man film crew, plus it looks really professional.
One problem I run into while using the DR-70D with my audio bag is the battery compartment. Since it’s on the back of the device, the rear flap opens into the bottom of my bag. If there weren’t a door on the bottom of my bag, this would render both the bag and the recorder incompatible. It’s still a little tricky to access, but the door is rugged enough to withstand the abuse I put it through.
Speaking of the battery department: this device is quite the battery hog. It runs through AA batteries very quickly so I recommend investing in some rechargeable batteries. I use the Panasonic Eneloops, but I am considering investing in Eneloop Pro’s which can supply more voltage at once. I’ve found that the devices detect that freshly charged batteries are only ⅔ full, which doesn’t bode well for the efficiency of the batteries.
If you’d like a budget alternative to the DR-70D, consider the Tascam DR-60DmkII. This is also a 4-channel audio recorder with many of the same features as the 70D but costs $100 less. It doesn’t have the built-in microphones, which is probably where a lot of the cost went. In my opinion, the 60DmkII is a steal for the price. I opted for the 70D mostly because of the form factor – I wanted something more compact, and the 60D is fairly thick compared to the 70D.
Summary and Final Thoughts
Overall, I’m happy with the way that the DR-70D has worked for me so far. I have had no problems with it, and that’s all I need from an audio recorder. I am a happy camper as long as my equipment does its job properly. My only checklist when upgrading was additional inputs and on the fly levels adjustment, and the 70D delivered. Consider giving it a shot if you’re looking for a new audio recorder.
If you’re interested in learning more about the DR-70D or making a purchase, you can do so through this paid affiliate link. The image above will take you to the specific bundle that I bought for my filming rig. We make a small commission when you make purchases through these links, which helps support content like this and doesn’t cost you anything additional. Thanks for reading!

